
School emergency planning is crucial for the safety of your campus and everyone in it. From active drills to emergency reunification of students with guardians, school districts must have comprehensive plans in place.
Several states have passed legislation requiring schools to include reunification as part of their school safety plan. Florida House Bill 1421 is an example of a law that requires “public childcare and educational facilities to have a reunification plan in the event they need to be closed or evacuated.”
Although reunification plan laws vary from state to state, schools can incorporate reunification into their safety plans to regain control during and after a campus emergency. Innovative school visitor management systems can improve reunification procedures, at no added cost.
The CENTEGIX Visitor Management System for Emergency Reunification

Check Students Into the Reunification Area
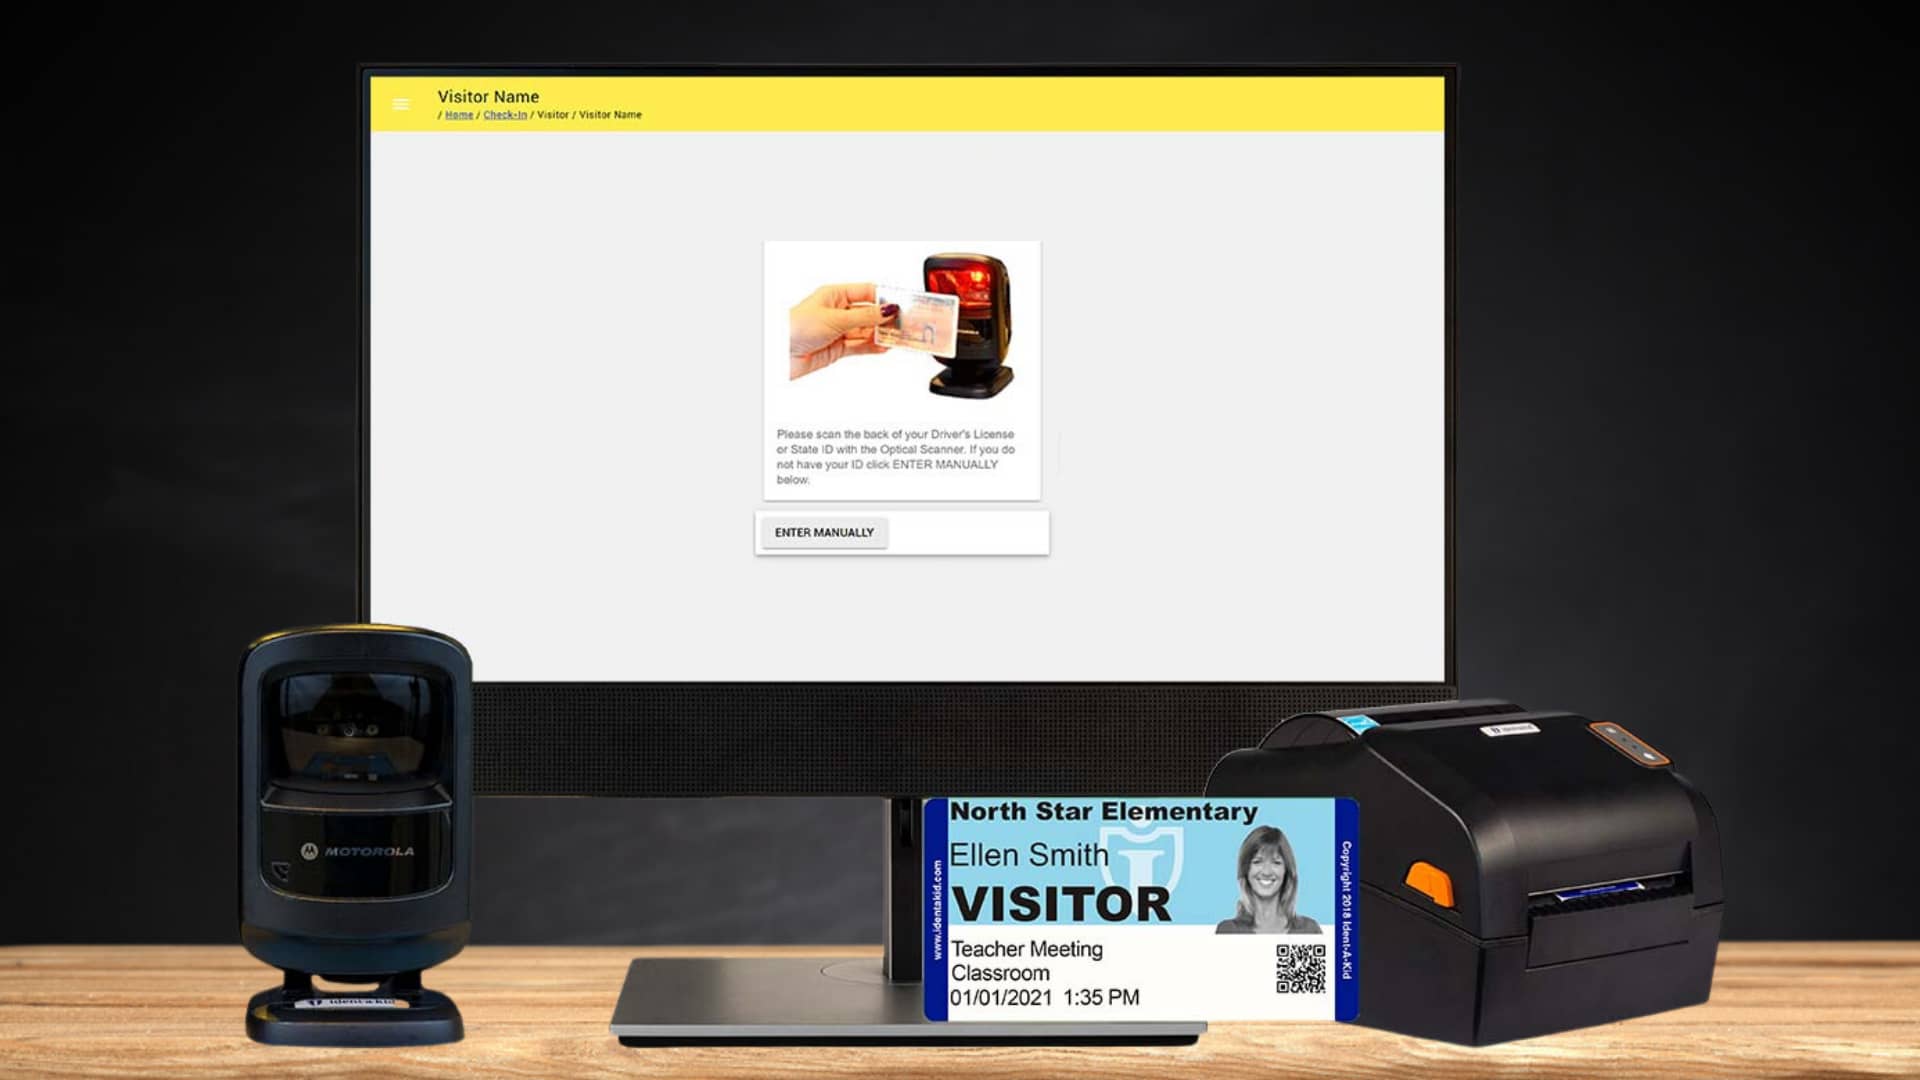
As students arrive at the designated reunification area, staff will sign them in for an accurate headcount. Using a clipboard sign-in sheet puts additional burdens on staff and leaves room for human error. School visitor management systems, like CENTEGIX Visitor Management, can be used on any device to digitally check-in students. Staff can use an ID scanner or type in individual names. Student preloaded lists will autocomplete students’ names as staff enter information to accelerate the process.
CENTEGIX Visitor Management scanners can scan physical and digital student ID barcodes to check a student into the reunification area.
Accurate and Real-Time Student Reports
When a staff member checks a student into the reunification area, CENTEGIX VIsitor Management automatically updates all reports. This means all student reports are accurate in real-time for staff to account for each and every student.
Student Reunification Procedure
Recommended procedures in this article may vary depending on specific school districts, and that’s okay. We recommend schools read sources and guidelines to create a tailored plan.
Step 1: Notify All Parties Involved
Before an emergency, establish a system or process to contact all relevant parties during a crisis. This could include first responders, a district’s emergency response team, teachers, and staff.
Step 2: Establish a Chain of Command
During the planning stage, establish a chain of command and response team to fulfill specific roles during reunification.
Step 3: Transport Students to the Reunification Site
Depending on the emergency, the reunification site may be on the school campus, or students may need transportation to a previously established location. Staff should maintain accurate student rosters to ensure 100% student accountability and safety.
Step 4: Establish a Check-in Location for Parents and Guardians
Parents and guardians will arrive at the reunification site soon after being contacted. Prepare the previously designated area for parent and guardian check-in with supplies necessary for reunification on hand.
Step 6: Parents Fill Out Reunification Information
After confirming ID and custody, parents and guardians should provide the required information on cards issued to begin reunification.
Step 7: Reunify Student with Parent or Guardian
Once all the necessary information has been provided, your team will retrieve the student and reunify them with their parent or guardian.
For more information about the student reunification process, visit:
These two resources can provide you with a greater level of detail, training, and insight for planning and executing student reunification.
Use CENTEGIX Visitor Management to Check-in Parents
An accurate report of students in the reunification area is a basic responsibility, and it’s equally important to produce an accurate record of parents and guardians who pick up their student(s). We recommend you scan licenses for speed and accuracy. Schools can set up a kiosk station or have an attendant enter guardian information.
Custody Issue Monitoring with CENTEGIX Visitor Management
Perhaps more than at any other time, during a school emergency students are vulnerable to issues such as custody disputes. Not only does CENTEGIX Visitor Management record check-ins, but the system will automatically check for documented custody issues.
The system will alert your team to any custody issues so they can ensure that students leave with an approved guardian, and no one else.
Print Passes for Runners
Once staff check in a parent or guardian, CENTEGIX Visitor Management can print a pass for your runners. This pass will have the student’s name and a QR code to scan.
Quickly Dismiss Students From Reunification
Once a student is reunited with their parent or guardian, you can scan the QR code printed on the Runner’s pass. This automatically checks the student out and updates your student reports.
An example of a reunification report after students have been dismissed with their parents or guardians.
How to Create a Reunification Check-in Badge in CENTEGIX Visitor Management
Step 1: Sign in to your CENTEGIX Management Web Manager. This is the application used for adding users, customizing settings, and creating reports.
Step 2: Go to Settings> Badge Settings> select “Add New Badge.”
Step 3: Select Display and edit the title field “Parent Reunification.”
Step 4: Select “Check-In/Out” from the Web Client Display Button menu.
Step 5: Enter Parent/Guardian in the Name Label Prefix box.
Step 6: Select “Students” from the Pre-loaded Category to Load menu.
Step 7: Activate “Enable Student Contact Relationship” by moving the slider to blue.
Step 8: Return to Badge Settings> select Auto Logout> set to “None.”
Step 9: Return to Badge Settings> edit info fields 1 and 2 to gather any additional desired information.
Step 10: Edit the Title> activate the option “Displayed” to make it visible to the end-user.
Step 11: Activate “Required” (User must input info to proceed.)
Step 12: Activate “Printed” (Input data will print out on slip.)
Step 13: Activate “Freeform Entry” will allow the user to enter custom data.
Step 14: Select Answers to provide predetermined answers to info field questions only eight answers will display simultaneously on-screen.
Step 15: To post attendance and additional information back to PowerSchool. Enable info Field 4 and title it “Current Class,” activate “Required and Displayed.” Enter the desired Attendance code into the Answer box.
For assistance setting up your CENTEGIX Visitor Management system for reunification, schedule a conversation with our support team by calling 800-950-9202 or emailing support@centegix.com.